Arduino LCD and Buttons Module
This class will be focased on using a Shield that has an 16 x 2 LCD display with 6 navigation buttons. The 16 character by 2 row LCD display is standard, and works with many of the libraries. The button arrangement is little weird, as the buttons are connected to a resistor ladder, and to interpret the action, a A/D with library reference must be used.
- DFRobot LCD shield Wiki: How to
- DFRobot LCD shield Example
- Arduino.cc Hello World LCD shield Example
- DFRobot LCD shield shopping
- Cohesive Computing LCD menu builder
INTRODUCTION
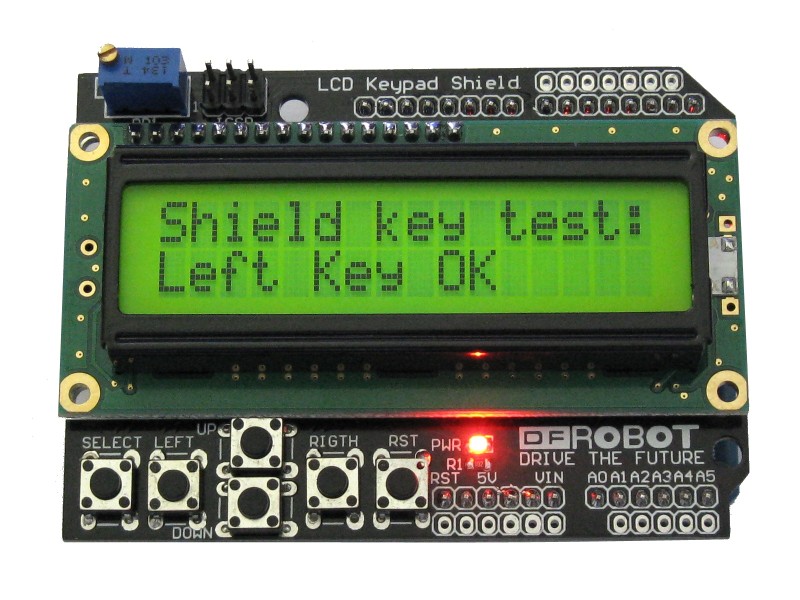
This is a very popular LCD Keypad shield for Arduino and other variants. It includes a 2x16 LCD display and 6 momentary push buttons. Pins 4, 5, 6, 7, 8, 9 and 10 are used to interface with the LCD. Just one Analog Pin 0 is used to read the five pushbuttons. The LCD shield supports contrast adjustment and back-lit on/off functions. It also exposes five analog pins with DFRobot color code for easy analog sensor plugging and display. The on board LED indicates power on.
This lcd arduino shield has 5 keys, select, up, right, down and left which allow you move through menus and make selections straight from one board attached to your Arduino project without requiring a massive tower of shields.
This design allows you keep connecting sensors to the rest of the pins, and use it for monitoring or menu selection with the push buttons even for gaming. Project applications require testing or debugging. Displaying information right away help on most occasions when a computer is not at reach. If you are planning to build something not attached to a computer and you need to check what is going on when you place it on position, this addition will prove very valuable to make sure the program is running well.
The used LCD pins are not exposed on top side of the board leaving only the unused ones. This way, conflict with LCD pins on top of the board will not happen anymore. This design includes a APC / Bluetooth v3 socket to enable you data transmission with your robot.
Menu Builder
To keep things simple, all coding examples have been targeted to work with an R3 Arduino Uno/Leonardo/Mega2560, and an LCD keypad shield similar to one illustrated above. There are numerous manufacturers of LCD keypad shields that have the same or similar pin connections, and you must ensure that the sample menu code uses the pin connections that are right for your shield. If the keypad buttons of your shield give different analog readings, you will need to make changes to file LcdKeypad.h. Bear in mind that the analog readings are not always consistent, which can lead to the occasional misreporting of a button press. Once you become familiar with the menu library, adapting it for use with other input and display devices should be straight-forward.